
Help · How-To Guide
How to Mount and Seat a Tire Safely
The safety rules for mounting a tire, seating the beads and inflating it, including split rims and lock rings, from OSHA and the tire industry.
Tire and rim servicing can be dangerous. A tire and wheel can separate with explosive force. Only trained people with the right tools should mount tires. This guide covers the key rules; it doesn't replace training or the equipment maker's instructions.
Step 1 of 7
Match and Inspect
- Match the diameters. Never put a tire on a rim unless you have positively identified both and the diameters match. A 16 in tire goes on a 16 in rim, never a 16.5.
- Never mount a passenger car tire on a motorcycle rim. The bead seat and flange are different.
- Inspect the wheel and parts. Bent, pitted, cracked or broken parts must not be used. Tag them unserviceable and take them out of the work area.
- Replace damaged or leaking valves.
- Wear eye protection and work with the right tools, never a cheater bar on tire irons.
Step 2 of 7
Deflate Completely
- Remove the valve core and let all the air out before you demount. Never demount a tire unless you're sure it is fully deflated.
- Truck multi-piece wheels: if the tire ran at 80% or less of its pressure, or the wheel may be damaged, deflate it with the core out before you take it off the axle.
- Run flat or underinflated steel cord radial truck tires can have hidden sidewall damage. Inspect them in a safety cage as USTMA describes before you put them back in service.
Step 3 of 7
Lubricate the Beads
- Use a non-flammable tire mounting lubricant on the tire beads and the rim mating surfaces, unless the tire maker says not to.
- Never use antifreeze, silicone or petroleum based products as a mounting lube.
- Never use starter fluid, ether, gasoline or anything flammable to lubricate or seat beads, and never ignite anything in a tire to seat it.
Step 4 of 7
Mount From the Narrow Side
- Mount and demount from the narrow ledge side of a single piece wheel, the side nearest the drop center well.
- Lock the wheel down on the tire machine per the machine maker's instructions.
- Keep the bead in the drop center as you work it over the flange. Forcing it can damage the bead, and a bead damaged tire can explode during mounting or fail later.
Step 5 of 7
Seat the Beads: 40 PSI Max
Never go over 40 psi to seat beads, unless the tire maker gives a different limit. That holds even in a safety cage.
- Use a clip-on air chuck with an in-line valve and a gauge or presettable regulator, and enough hose to stand clear.
- Stand clear. Never stand, lean or reach over the tire and wheel while it is inflating.
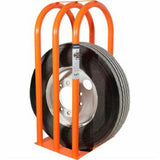
- Lock it down or cage it. Seat beads with the wheel locked on the machine, or in a safety cage or other restraining device.
- Not seated by 40 psi? Let all the air out, reposition the tire, re-lubricate and try again.
- Check both sides to be sure the beads seated evenly.
Step 6 of 7
Inflate to Pressure
The trajectory is any path a part could travel if the assembly lets go, which isn't always straight out from the wheel. Stay out of it.
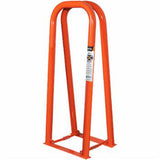
- Single piece truck, bus, trailer, tractor and off-road wheels must be inflated in a restraining device, behind a barrier, or bolted on the vehicle with the lug nuts fully tightened (OSHA 1910.177). Multi-piece wheels go in a restraining device; see step 7.
- Keep a foot of clearance. Don't inflate if a flat, solid surface in the trajectory is within one foot of the sidewall.
- Never go over the maximum pressure on the sidewall unless the tire maker recommends it.
- Don't rest or lean any part of your body or equipment on the cage while inflating.
- Tube type tires: once the beads seat, let the air out and re-inflate so the tube can settle without folds.
Step 7 of 7
Split Rims and Lock Rings
Multi-piece rims are covered by OSHA 1910.177 and need specific training. The key rules:
- Deflate with the valve core out before you demount, and before you remove the wheel from the axle if the tire ran at 80% or less of its pressure or may be damaged.
- Match the parts. Don't mix rim components except as the rim matching charts or the rim manual allow.
- Lubricate the bead and rim mating surfaces with rubber lubricant unless the maker says not to.
- Outside the cage, inflate only enough to seat the bead on the ledge and make an airtight seal. Do the rest in the restraining device.
- Check the rings in the cage. If they aren't seated and locked, let the air out with the core removed before you adjust anything.
- Never hammer or force a side ring or lock ring while the tire has pressure in it.
- Never weld, braze, heat or rework a cracked, broken, bent or damaged rim part, and never apply heat to a multi-piece wheel.
- Stay out of the trajectory the whole time.
Equip the bay
Tire changers, bead seaters, cages and lube in stock. Questions? Call 800-328-7400.
- Sources: OSHA 29 CFR 1910.177, Servicing multi-piece and single piece rim wheels; OSHA/USTMA Demounting and Mounting Procedures for Tubeless Truck and Bus Tires wall chart; USTMA Tire Information Service Bulletins Vol. 46 No. 4, Vol. 43 No. 4, Vol. 33 No. 6 and Vol. 5 No. 3 and No. 4; Continental Tire Mounting Safety Instruction (2023).